
Chocolate Cheesecake

Chocolate cheesecake is the kind of dessert that always feels like a treat. It’s rich, creamy, and deeply chocolatey without being too heavy. I’ve made a few small tweaks over time that turn it from good to bakery-worthy, and once you know the trick, you’ll never make it any other way.
This post contains affiliate links. As an Amazon Affiliate, if you purchase through those links, I earn a commission. Thank you!
Chocolate cheesecake is my go-to make-ahead dessert. It chills in the fridge until serving, making it perfect for parties or family dinners. Easy to slice, it stores well and even freezes for later.
Ingredients You’ll Need
You’ll need all the ingredients shown in the photograph below.

How to Make Chocolate Cheesecake with Step-By-Step Instructions
Scroll down for the full recipe card containing a full printable recipe and measurements in both US customary and metric units.
If you follow my simple instructions, you’ll find this chocolate cheesecake surprisingly easy to make.
Prepare the Crust
Add the chocolate cracker crumbs and sugar to a medium bowl. I like using this glass mixing bowl because it’s comfortable to handle and gives just enough space to mix everything mess-free.
Stir in melted butter until it resembles wet sand so the crust holds together and slices neatly after baking. Press the mixture into the bottom of a 9-inch springform pan and bake at 350°F for 8 minutes.
I use this nonstick springform pan, which makes it easier to release the cheesecake without damaging the bottom or sides. Then, I line the bottom with this round parchment paper, so I’m not wrestling with scissors or curled edges.
To pack it down evenly, I enjoy using a portable wooden tamper as it makes shaping more precise and saves time. Set aside while you prepare the filling.
SERIOUSLY GOOD
DESSERTS!
Dessert First is a collection of 61 RECIPES to show you that you can make beautiful, impressive desserts right in your own kitchen, no matter your skill level.
Immediate eBook download. No physical book available.
∙ Lemon Pound Cake
∙ Starbucks Cake Pops
∙ Boston Cream Pie
∙ Chocolate Mousse
∙ Matcha Tiramisu
...and much more!
Includes ad-free recipes like:

Make the Cream Cheese Base
In a large mixing bowl, beat the softened cream cheese with an electric mixer on medium speed for about 2-3 minutes to achieve a smooth consistency. I like using this stainless steel mixing bowl because it’s spacious and stays in place as you work. Then, I pair it with my 6-speed electric hand mixer since it gives me better control and avoids overbeating.
Add the sugar gradually, whisking until it is well combined. Mix the eggs one at a time, scraping down the bowl between each. This silicone spatula is perfect for helping you scrape down the sides cleanly, without scratching the bowl or leaving any batter behind.
Pour in the vanilla extract.
Melt the Chocolate
Use a microwave in 30-second bursts or a double boiler to melt the chocolate. I melt mine in this microwave-safe glass bowl as it heats evenly and doesn’t overheat during short bursts.
Stir until creamy and let it cool slightly so it blends easily without seizing the batter.
Blend the Chocolate and Cream
Switch the mixer to low and slowly stream in the melted chocolate. Once it’s fully incorporated, whip in the heavy cream, keeping it silky and uniform.
Fill the Pan and Bake
Pour the filling over the crust and smooth the surface with a spatula. I reach for this offset spatula when I need to level the top without disturbing the base.
Bake for 50–60 minutes, just long enough for the edges to set while the center remains a bit wobbly.

Cool and Bring to Room Temperature
Turn the oven off, crack the door open, and let the cheesecake cool inside for 1 hour. This helps prevent cracks from forming.
Remove from the oven, let it come to room temperature, and then refrigerate for at least 4 hours or overnight. I cool mine on this sturdy wire rack, as it allows air to circulate perfectly before I put it in the fridge.
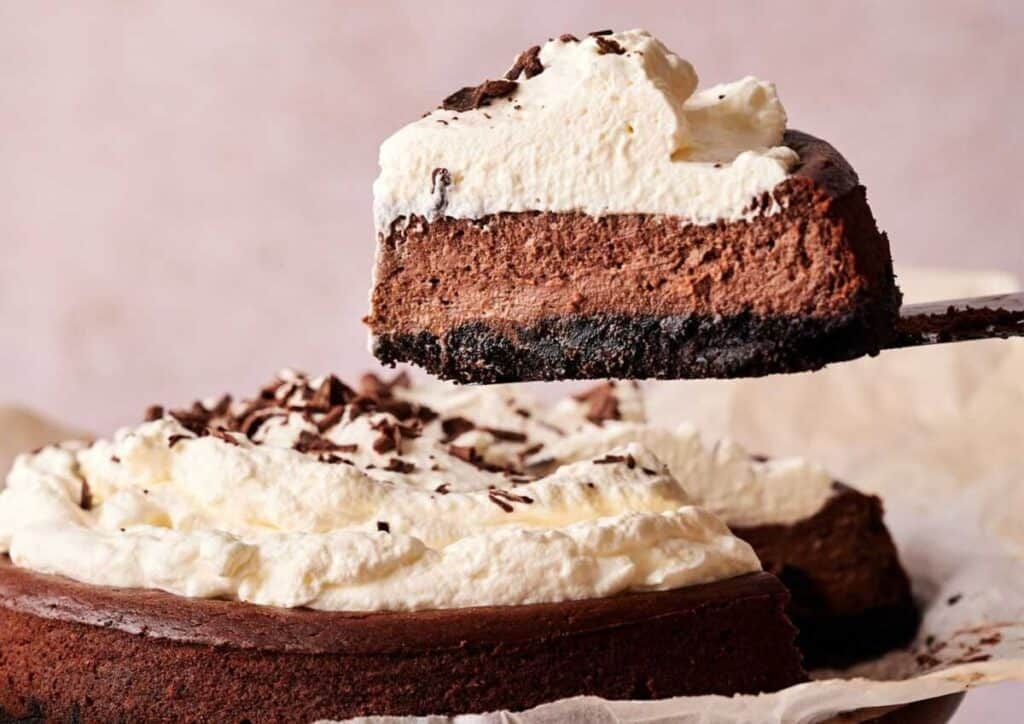
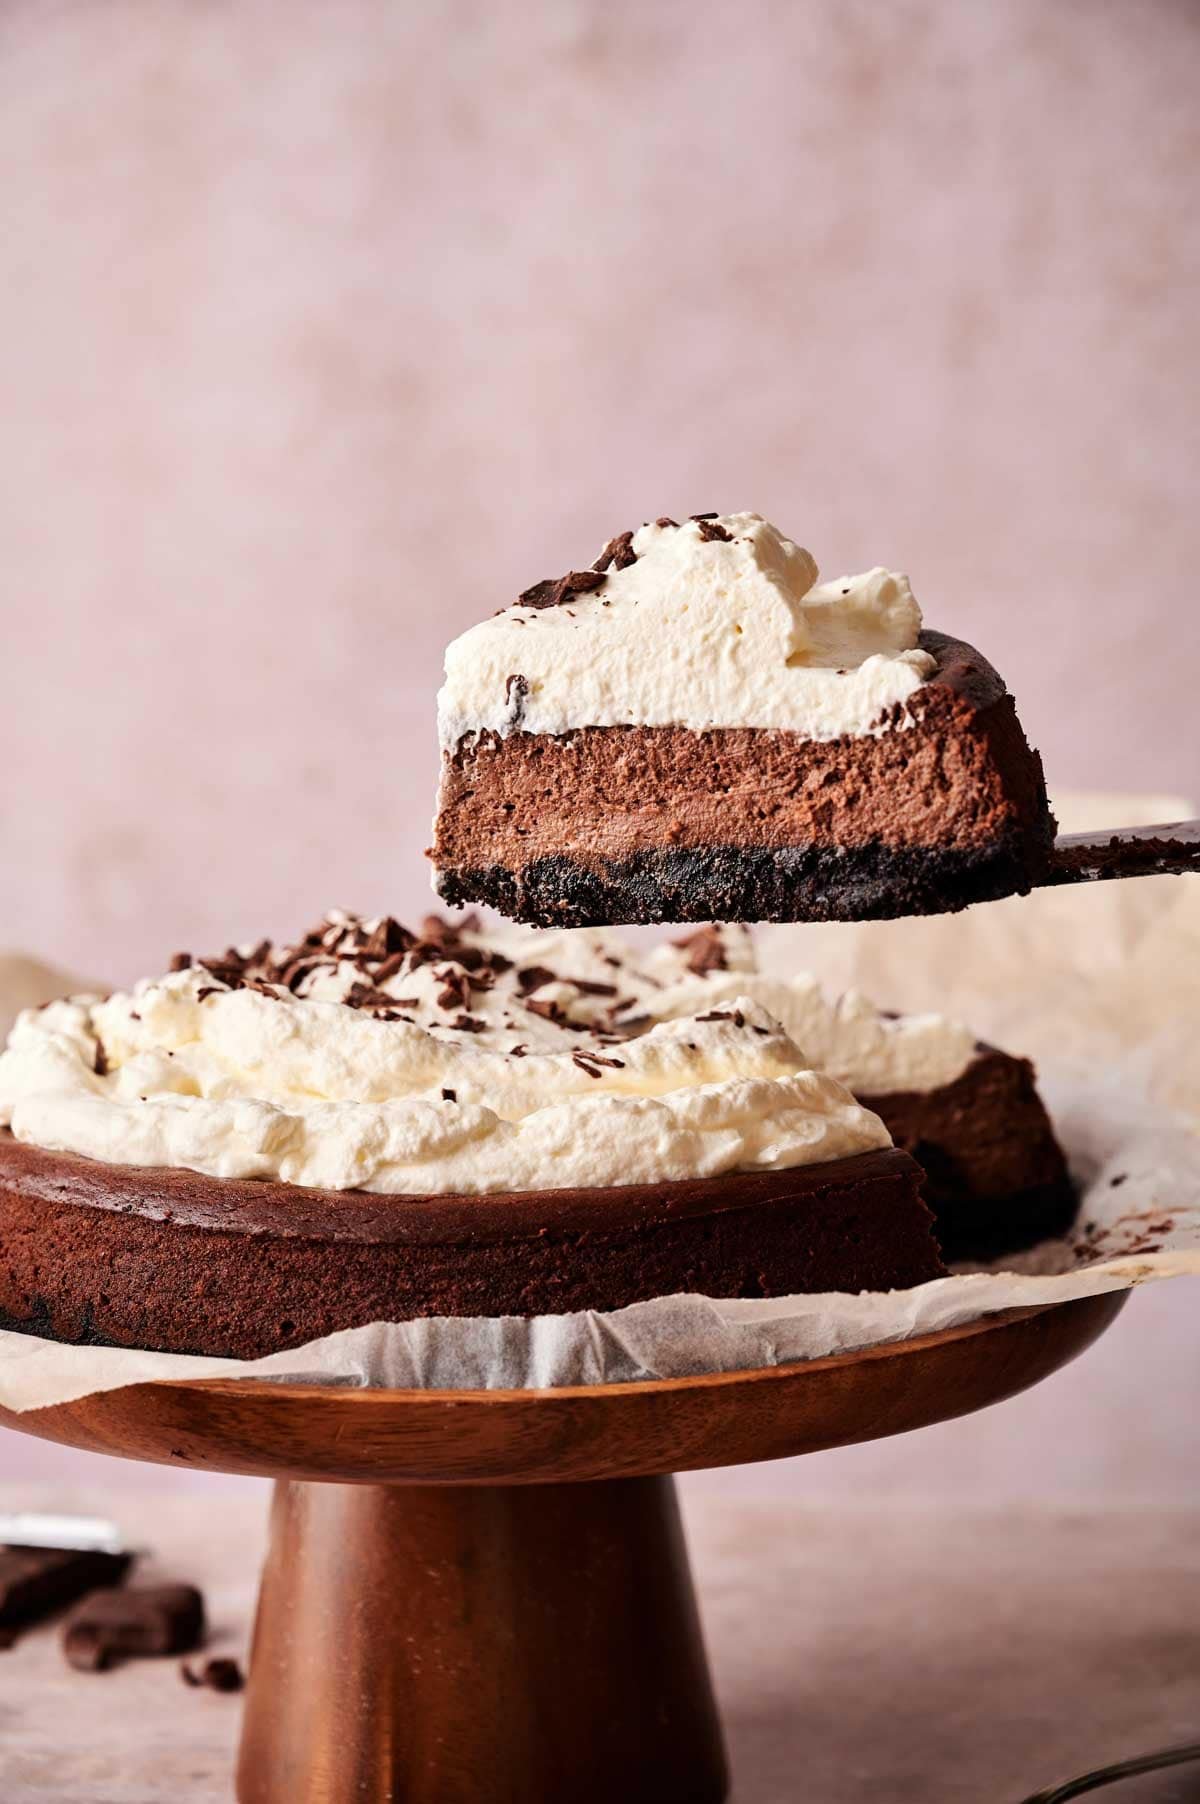
Serve and Slice
Before serving, top with whipped cream and chocolate chips or shavings. If I’m feeling a little fancy, I use a piping bag to swirl the whipped cream on top for a cleaner, more polished look.
When I want picture-perfect slices, I grab this stainless steel cake cutter and server because it cuts smoothly through the filling with no breaking of crust.
Then all that’s left is to dig in and enjoy your creamy Chocolate Cheesecake!
If you’re bringing this cheesecake to a dinner or holiday gathering, pack it in a round container like this one so it doesn’t shift or get damaged during the ride. To keep it cool along the way, slide the whole container into this round insulated carrier, which holds temperature well without tipping or taking up too much space.
Equipment
Ingredients
For the crust:
- 1½ cups chocolate cracker crumbs such as chocolate graham crackers or chocolate wafers
- ¼ cup granulated sugar
- ⅓ cup unsalted butter melted
For the filling:
- 16 ounces cream cheese softened
- 1 cup granulated sugar
- 3 large eggs
- 1 teaspoon vanilla extract
- 8 ounces semi-sweet chocolate melted and slightly cooled
- ½ cup heavy cream
For serving:
- Whipped cream
- Chocolate shavings or curls

Video
Instructions
- Preheat your oven to 350°F (180°C).
- In a medium bowl, combine the chocolate cracker crumbs and sugar. Stir in the melted butter until the mixture resembles wet sand. Press the mixture evenly into the bottom of a 9-inch springform pan.1½ cups chocolate cracker crumbs, ¼ cup granulated sugar, ⅓ cup unsalted butter
- Bake the crust for 8 minutes, then set aside to cool slightly while you prepare the filling.
- In a large mixing bowl, beat the softened cream cheese with an electric mixer on medium speed until smooth and creamy, about 2–3 minutes. Gradually add the sugar and continue mixing until fully incorporated.16 ounces cream cheese, 1 cup granulated sugar
- Add the eggs one at a time, beating well after each addition and scraping down the sides of the bowl as needed. Mix in the vanilla extract.3 large eggs, 1 teaspoon vanilla extract
- Melt the semi-sweet chocolate using a microwave (in 30-second intervals, stirring between each) or a double boiler until smooth. Let cool slightly.8 ounces semi-sweet chocolate
- With the mixer on low speed, slowly pour the melted chocolate into the cream cheese mixture. Mix until fully combined. Add the heavy cream and mix until the batter is smooth and silky.½ cup heavy cream
- Pour the filling over the prepared crust and smooth the top with a spatula. Bake for 50–60 minutes, or until the edges are set and the center is just slightly jiggly.
- Turn off the oven, crack the oven door open, and let the cheesecake cool inside for 1 hour. Remove from the oven and allow it to come to room temperature. Refrigerate for at least 4 hours (or overnight) before serving.
- Top with whipped cream and chocolate shavings for an elegant finish. Slice and enjoy!Whipped cream, Chocolate shavings or curls
Notes
- Swap in an Oreo Crust: For a sweeter, darker base, replace the graham crackers with crushed chocolate sandwich cookies. The chocolatey crust gives a nice contrast to the creamy filling.
- Start with Soft Cream Cheese: Let your cream cheese fully soften at room temperature so it blends smoothly without lumps. This is especially important if you’re using a stand mixer with a paddle attachment.
- Use Room-Temperature Eggs: This helps them mix evenly into the batter and support the creamy texture that chocolate lovers expect.
- Melt Chocolate Over Medium Heat: If you’re using a stovetop instead of a microwave, use a small pot over medium heat to gently melt the chocolate without scorching.
- Don’t Overmix the Batter: Stir just until combined to avoid incorporating too much air, which can cause cracks as the batter bakes.
- Skip the Water Bath: This baked chocolate cheesecake recipe doesn’t need one. Follow the slow cooling method and allow for a room temperature rest.
- Avoid Overbaking: The center should still jiggle slightly when you remove it. It will continue to firm up as it cools.
- Chill Fully Before Slicing: Refrigerate for at least 4 hours to allow the texture to firm up and slice cleanly.
Nutrition
SERIOUSLY GOOD
DESSERTS!
Dessert First is a collection of 61 RECIPES to show you that you can make beautiful, impressive desserts right in your own kitchen, no matter your skill level.
Immediate eBook download. No physical book available.
∙ Lemon Pound Cake
∙ Starbucks Cake Pops
∙ Boston Cream Pie
∙ Chocolate Mousse
∙ Matcha Tiramisu
...and much more!
Includes ad-free recipes like:
Recipe Notes and Expert Tips
I’ve picked up a few tips over the years to help make this cheesecake turn out beautifully every time:
- Swap in an Oreo Crust: For a sweeter, darker base, replace the graham crackers with crushed chocolate sandwich cookies. The chocolatey crust gives a nice contrast to the creamy filling.
- Start with Soft Cream Cheese: Let your cream cheese fully soften at room temperature so it blends smoothly without lumps. This is especially important if you’re using a stand mixer with a paddle attachment.
- Use Room-Temperature Eggs: This helps them mix evenly into the batter and support the creamy texture that chocolate lovers expect.
- Melt Chocolate Over Medium Heat: If you’re using a stovetop instead of a microwave, use a small pot over medium heat to gently melt the chocolate without scorching.
- Don’t Overmix the Batter: Stir just until combined to avoid incorporating too much air, which can cause cracks as the batter bakes.
- Skip the Water Bath: This baked chocolate cheesecake recipe doesn’t need one. Follow the slow cooling method and allow for a room temperature rest.
- Avoid Overbaking: The center should still jiggle slightly when you remove it. It will continue to firm up as it cools.
- Chill Fully Before Slicing: Refrigerate for at least 4 hours to allow the texture to firm up and slice cleanly.
How to Store Leftovers
Store leftover chocolate cheesecake covered in the fridge for up to 5 days. I store slices in these airtight glass containers; they seal tightly, keep smells out, and make it easy to grab a slice straight from the fridge.
You can also freeze it by wrapping slices tightly in plastic wrap and foil. I start with a layer of plastic wrap over each slice, then I wrap it again with this heavy-duty aluminum foil to prevent freezer burn and maintain texture.
Freeze for up to 1 month and thaw in the fridge overnight before serving. The texture remains creamy, though toppings like whipped cream are best added fresh.
More Easy Recipes for You to Try at Home
I’ve got more simple, satisfying desserts like this one that you can keep in your back pocket.