
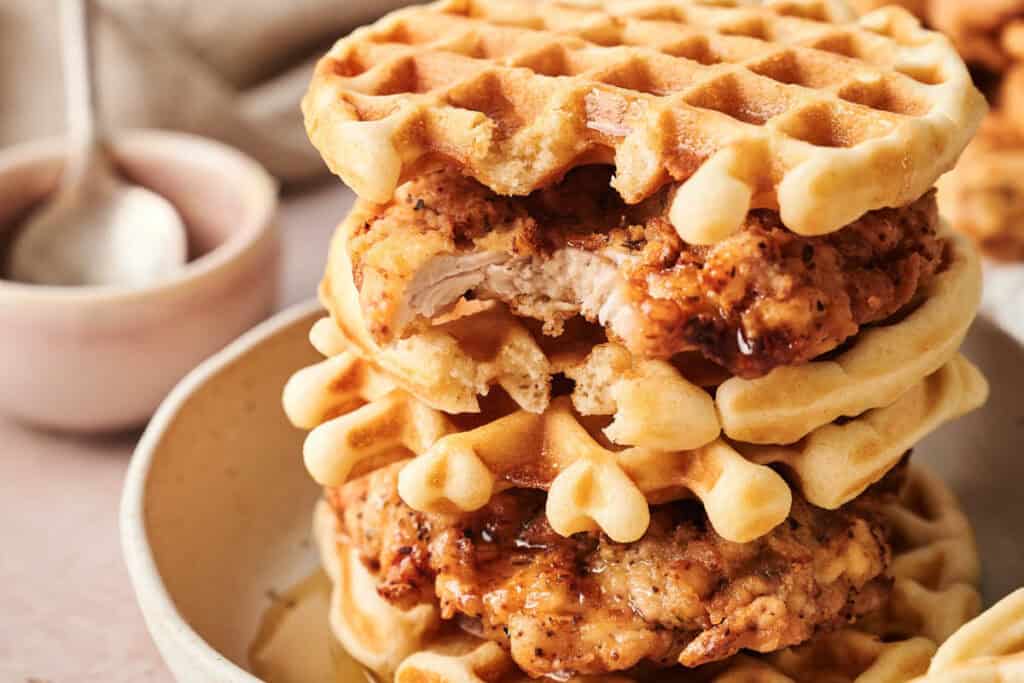
Chicken and Waffles

For me, there’s nothing like a warm, comforting, and deliciously filling meal than this homemade Chicken and Waffles recipe. With the savory crunch of fried chicken and the classic sweetness of fluffy waffles, you get to enjoy the best of both worlds with every bite. I’ve got a few simple tricks that bring out their best textures every time.
This post contains affiliate links. As an Amazon Affiliate, if you purchase through those links, I earn a commission. Thank you!
Whether it’s a weeknight dinner, a brunch, a hearty breakfast, or a game day food with friends, this dish is always a hit and a crowd favorite. Everybody’s coming back for their seconds, so I rarely have any leftovers. If you do, the chicken and waffles store well separately, and even freeze and reheat beautifully.
Ingredients You’ll Need
You’ll need all the ingredients shown in the photograph below.

How to Make Chicken and Waffles with Step-By-Step Instructions
Scroll down for the full recipe card containing a full printable recipe and measurements in both US customary and metric units.
If you follow my easy steps, you’ll see how simple it is to get perfectly crispy chicken and golden waffles right in your own kitchen.
Make the Waffle Batter
In a large bowl, prepare the waffle batter according to the package directions. Usually, you’ll combine the waffle mix here with liquid like a splash of milk or water, an egg or more, and a bit of oil or melted butter.
I use this batter bowl with a handle and spout so I can pour or transfer the batter easily without a mess.
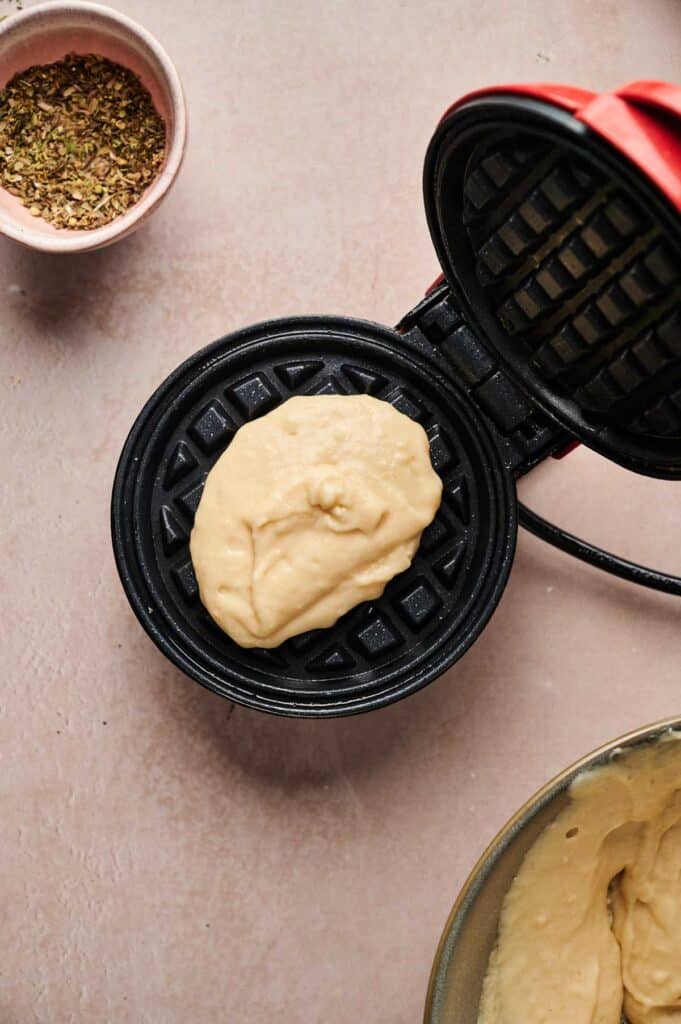
Cook the Waffles
Once you have your waffle batter ready, divide it into six equal portions and pour each one into the center of a preheated waffle maker so it doesn’t drip or overflow on the sides.
A nonstick mini waffle maker like this one comes in handy and is super easy to clean. For dividing the batter, you can use a measuring cup or a cookie scoop to make portioning more even and consistent without spilling.
Make sure the waffle maker’s plate is already hot before adding the batter so your waffles come out crisp and golden on the outside and fluffy inside.
As each one finishes, place it on a wire rack instead of stacking them on a plate. This helps them stay light and crisp, preventing them from getting soggy. I use a nonstick cooling rack to keep them from steaming or sticking.
Prepare the Coatings
In a medium bowl, whisk together the egg and buttermilk until the mixture is smooth and uniform. Make sure the yolk is fully broken down and blended, as this helps the coating stick evenly to the chicken.
In another bowl, stir together the flour, cornstarch, Italian seasoning, garlic salt, and black pepper until everything is evenly mixed for consistent flavor throughout. A balloon whisk works great for getting everything well mixed without splashing.
Coat the Chicken
Now, dredge each piece of chicken in the seasoned flour mixture, then dip it into the egg mixture, and finally coat it again with flour. This will give your fried chicken pieces extra crunch and a nice, golden crust later. Press gently so the coating sticks.
Set the chicken on another wire rack for a few minutes to rest before frying, which helps the breading cling better without falling off when the chicken hits the hot oil.
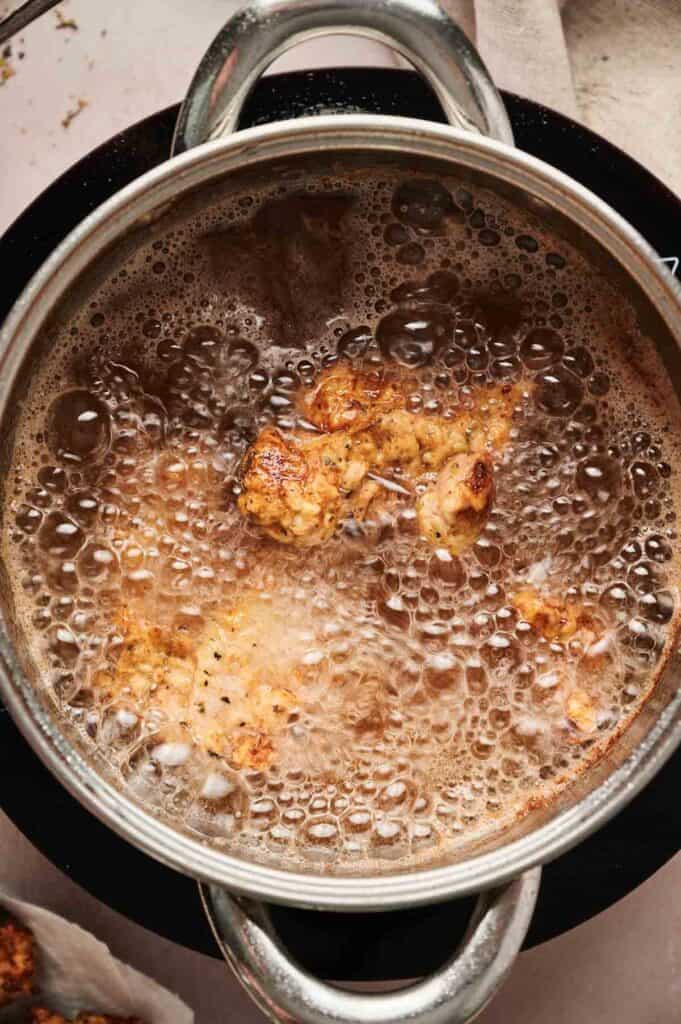
Fry the Chicken
Heat about ½ inch of vegetable oil in a large skillet to 350°F or over medium-high heat. I like using a cast-iron skillet to hold the heat evenly and avoid temperature drops when the chicken is added.
Fry the chicken for 2–3 minutes per side until golden brown, and flip occasionally for about 12–15 minutes until the chicken is fully cooked through with a golden, crispy crust. These tongs with silicone tips make flipping easy without tearing off the crust.
Don’t overcrowd the pan; you’ll want to keep the oil temperature steady so every chicken fries evenly and crisps properly. If you can, cook in batches for the best results. A clip-on thermometer lets you monitor and maintain the right temperature.
Place cooked chicken on a plate lined with paper towels. This helps drain off any excess oil and keeps the coating nice and crisp before serving.
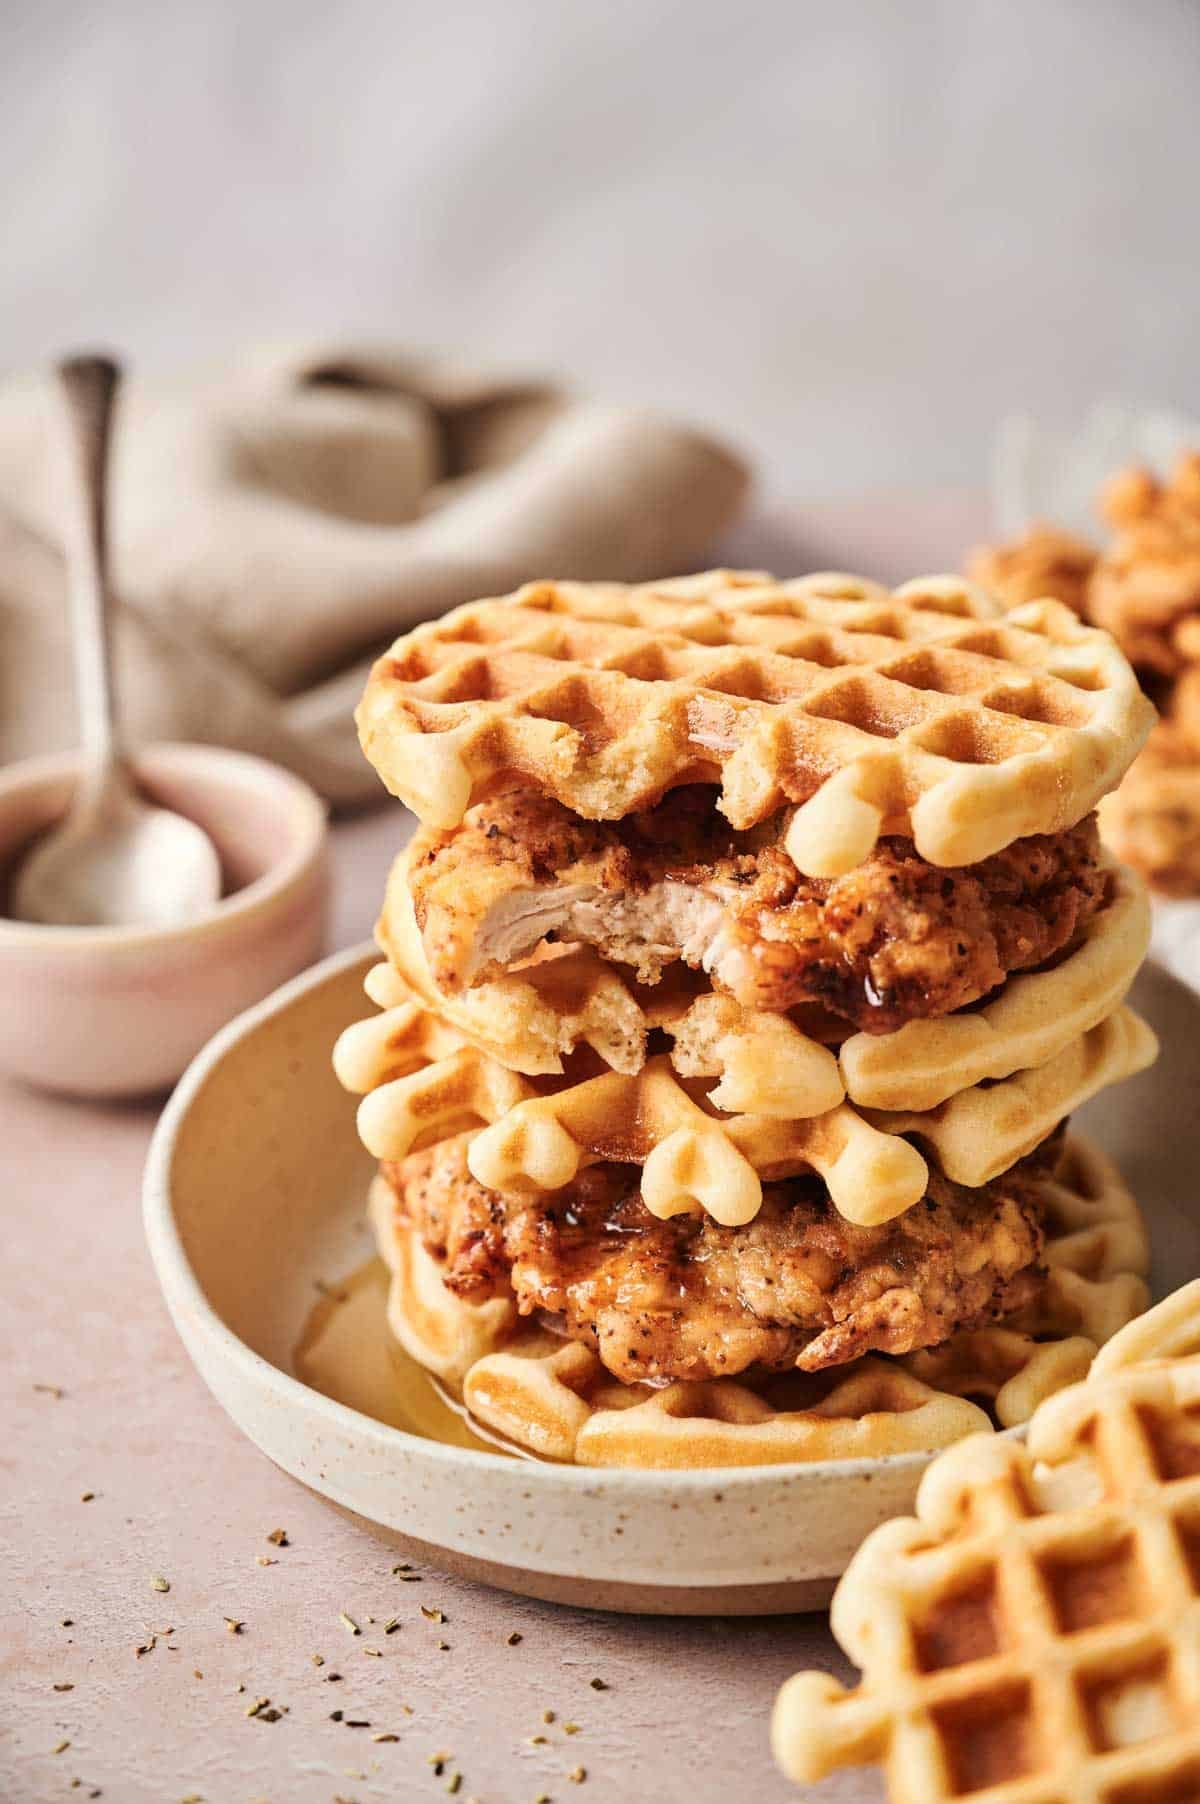
Assemble and Serve
Sandwich one piece of hot, crispy chicken between two waffles. Serve as is, or go the classic route and drizzle generously with maple syrup for the ultimate sweet and savory combo. Grab your knife and fork, and enjoy!
If you’re bringing this to a potluck, it’s best to keep the waffles and chicken in separate containers so they don’t arrive soggy. A hard-sided container protects waffles from getting squished while you’re on the go, and an insulated carrier keeps the chicken hot and crispy until you’re ready to assemble and serve.
Equipment
Ingredients
- 6 boneless skinless chicken thighs halved
- 1 large egg
- ½ cup buttermilk
- ½ cup all-purpose flour
- 1 tablespoon cornstarch
- 1 ½ teaspoons Italian seasoning
- 2 teaspoons garlic salt
- 1 teaspoon black pepper
- 1 box waffle mix enough for 6 waffles
- Vegetable oil for frying

Video
Instructions
- Cook the waffles according to package instructions (you’ll need 6 total). Place cooked waffles on a wire rack to stay crisp.1 box waffle mix
- In a medium bowl, whisk together the egg and buttermilk.1 large egg, ½ cup buttermilk
- In another bowl, mix flour, cornstarch, Italian seasoning, garlic salt, and black pepper.½ cup all-purpose flour, 1 tablespoon cornstarch, 1 ½ teaspoons Italian seasoning, 2 teaspoons garlic salt, 1 teaspoon black pepper
- Dredge chicken in the seasoned flour, dip in the egg mixture, then coat again in the flour. Press gently to help the coating stick. Place on a wire rack to rest.6 boneless skinless chicken thighs
- Heat about ½ inch of oil in a skillet to 350°F (180°C). Fry chicken for 2–3 minutes per side until golden, then continue flipping occasionally for a total of 12–15 minutes, until cooked through and crispy.Vegetable oil
- Transfer to a paper towel-lined plate. Place one piece of crispy chicken on top of a warm waffle.
- Serve as is, or drizzle with maple syrup for the perfect sweet-savory bite.
Notes
- Use a buttermilk brine: Soaking the chicken in a buttermilk brine for a few hours makes the meat juicier and more flavorful before coating.
- Swap the cut of meat: You can use chicken breasts instead of thighs, but they cook a little faster and may turn out less juicy.
- Season well: Garlic powder, onion powders, cayenne pepper, and other spices can be stirred into the flour mixture for extra flavor and heat, which comes close to southern-style chicken flavor.
- Boost crunch: Adding a spoonful of cornmeal to the flour coating gives the chicken a crispier, rustic texture.
- Make fluffier waffles: Separate eggs and whip the egg whites to stiff peaks with a hand mixer, then fold them into the batter with a silicone spatula if you want the lightness of Belgian waffles. It’s a great way to make your waffles extra fluffy.
- Keep waffles crisp: Set waffles on a wire rack as they cook so steam doesn’t soften them too much.
- Pick the best pan: A skillet works perfectly for frying chicken, but you can also use a Dutch oven if you want to maintain a more stable oil temperature. This Dutch oven has superior heat retention and even heat distribution.
- Drain after frying: Place the chicken on a paper towel-lined plate to keep it from getting greasy.
Nutrition
Recipe Notes and Expert Tips
I’ve picked out a few tips to make sure your chicken and waffles come out just the way you want them.
- Use a buttermilk brine: Soaking the chicken in a buttermilk brine for a few hours makes the meat juicier and more flavorful before coating.
- Swap the cut of meat: You can use chicken breasts instead of thighs, but they cook a little faster and may turn out less juicy.
- Season well: Garlic powder, onion powders, cayenne pepper, and other spices can be stirred into the flour mixture for extra flavor and heat, which comes close to southern-style chicken flavor.
- Boost crunch: Adding a spoonful of cornmeal to the flour coating gives the chicken a crispier, rustic texture.
- Make fluffier waffles: Separate eggs and whip the egg whites to stiff peaks with a hand mixer, then fold them into the batter with a silicone spatula if you want the lightness of Belgian waffles. It’s a great way to make your waffles extra fluffy.
- Keep waffles crisp: Set waffles on a wire rack as they cook so steam doesn’t soften them too much.
- Pick the best pan: A skillet works perfectly for frying chicken, but you can also use a Dutch oven if you want to maintain a more stable oil temperature. This Dutch oven has superior heat retention and even heat distribution.
- Drain after frying: Place the chicken on a paper towel-lined plate to keep it from getting greasy.
How to Store Leftovers
Store leftover chicken and waffles in separate airtight containers with a lid so they stay fresh and don’t soften each other. I use these stackable glass food containers that seal tightly and help keep my fridge space organized and neat.
Keep the chicken refrigerated for up to 3–4 days and reheat it in the oven or air fryer so it stays crisp. If using the oven, place the chicken in a single layer on a rimmed baking sheet lined with pre-cut parchment paper to keep cleanup easy. A compact air fryer gets chicken crispy again in minutes without heating the whole kitchen.
The waffles will hold up for a day or two at room temperature and in the fridge for more than 3 days, up to a week. Use a toaster oven to warm them; microwaving can make them soggy. This toaster oven warms waffles evenly without drying them out.
Both chicken and waffles freeze well in a freezer bag for up to 2 months, and even better if wrapped tightly. Freezer-safe bags like these are great for saving space. You can also add a layer of plastic wrap before sealing to prevent freezer burn.
Thaw the chicken overnight in the refrigerator before reheating, and reheat the waffles directly from frozen.
More Easy Recipes for You to Try at Home
I rounded up a few breakfast favorites, both savory and baked, so you’ll have options ready for your next brunch spread: