
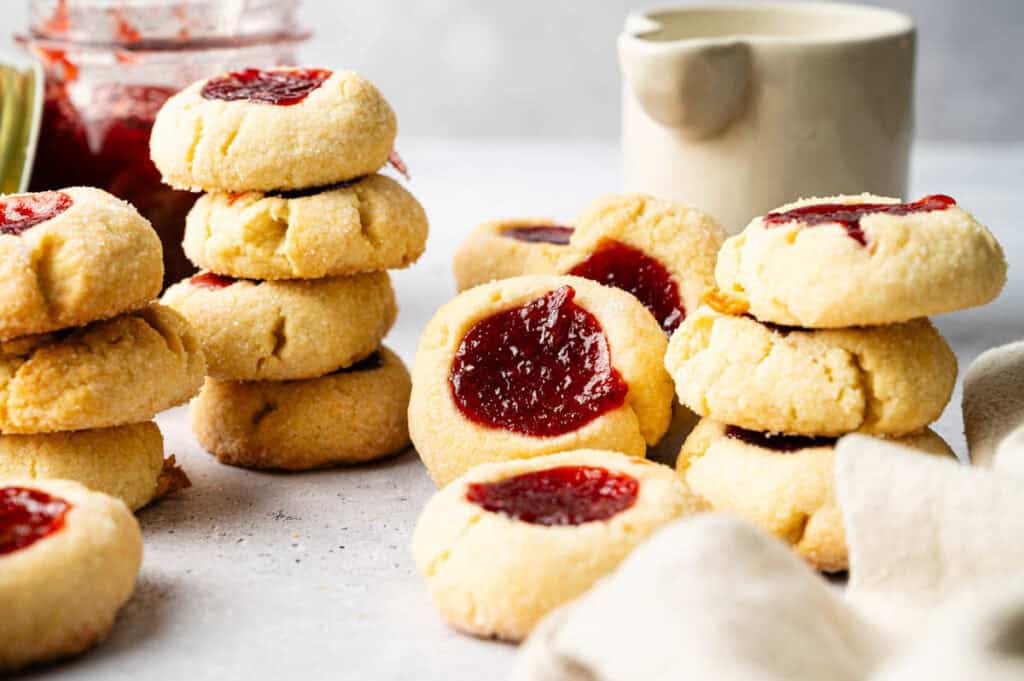
Thumbprint Cookies

I love that these Thumbprint Cookies look so pretty but come together so quickly. The dough ends up tender and rich, with a sweet jam center baked right into each golden, buttery cookie. One taste and you’ll realize these aren’t just beautiful cookies for parties; they’re the ones that disappear first from any dessert table.
This post contains affiliate links. As an Amazon Affiliate, if you purchase through those links, I earn a commission. Thank you!
I make these for Christmas cookie swaps, Valentine’s Day and Mother’s Day gifts, afternoon tea parties, and birthday celebrations because they look pretty on any dessert table. Kids love helping with the thumb-pressing part, making them perfect for holiday baking together. They stay fresh at room temp for 3 to 5 days or freeze beautifully for up to 2 months.
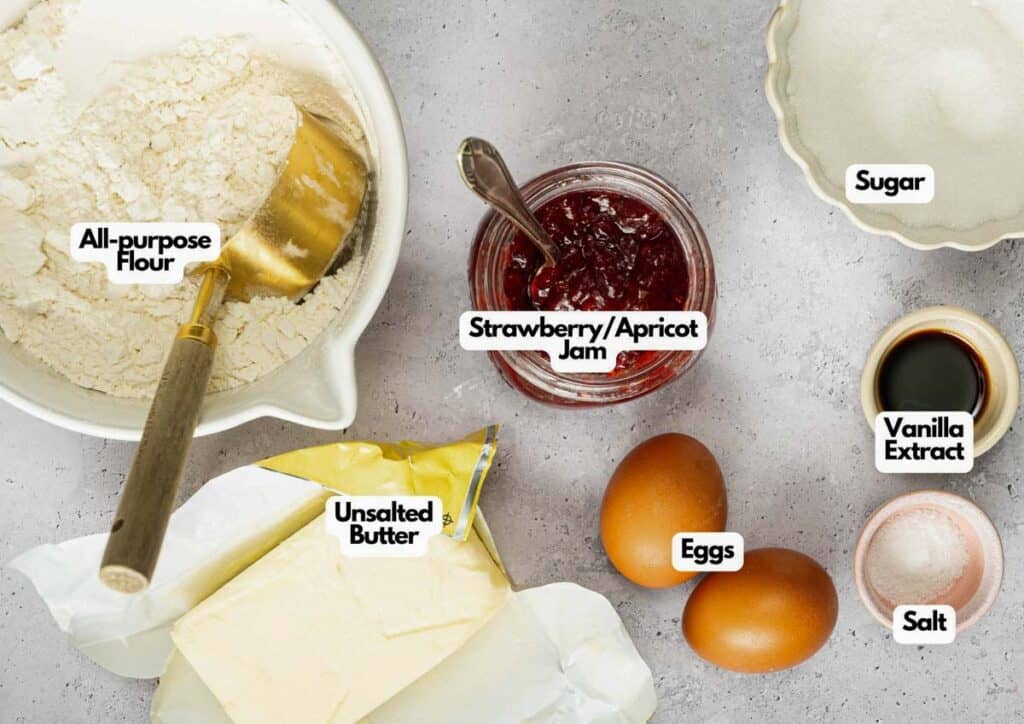
Ingredients You’ll Need
You’ll need all the ingredients shown in the photograph below.
How to Make Thumbprint Cookies with Step-By-Step Instructions
Scroll down for the full recipe card containing a full printable recipe and measurements in both US customary and metric units.
Here’s how to make these buttery cookies from start to finish.
Preheat and Prep Your Baking Sheets
Start by preheating your oven to 350°F and lining two large baking sheets with parchment paper or silicone mats.
I love using my silicone baking mats because cookies slide right off, and cleanup is so easy. Parchment works great, too, but silicone mats are reusable and last for years.
Cream the Butter and Sugar
In a large bowl or the bowl of a stand mixer fitted with the paddle attachment, beat the softened butter and granulated sugar together for 1 to 2 minutes until smooth and well combined. You’re not trying to get it super fluffy, just blended nicely.
Mix in the egg yolks, a teaspoon vanilla extract, and the salt until everything is fully incorporated. The dough will look creamy at this point.
SERIOUSLY GOOD
DESSERTS!
Dessert First is a collection of 61 RECIPES to show you that you can make beautiful, impressive desserts right in your own kitchen, no matter your skill level.
Immediate eBook download. No physical book available.
∙ Lemon Pound Cake
∙ Starbucks Cake Pops
∙ Boston Cream Pie
∙ Chocolate Mousse
∙ Matcha Tiramisu
...and much more!
Includes ad-free recipes like:

Add the Flour
Gradually mix in the all-purpose flour until the dough comes together. It might look crumbly at first, and that’s totally normal. Just keep mixing until it forms a smooth dough that holds together when you press it.
If you’re using a stand mixer, you can switch to low speed so you don’t overmix once the flour goes in.
Shape the Dough Balls
Scoop about 1 tablespoon of dough per cookie using a cookie scoop (I use a medium 1-tablespoon size for consistent cookies) and roll each portion into a smooth ball between your palms.
For a touch of sparkle, roll the dough balls in the remaining 3 tablespoons of granulated sugar before placing them on the prepared baking sheets. Space them about 2 inches apart since they’ll spread slightly.
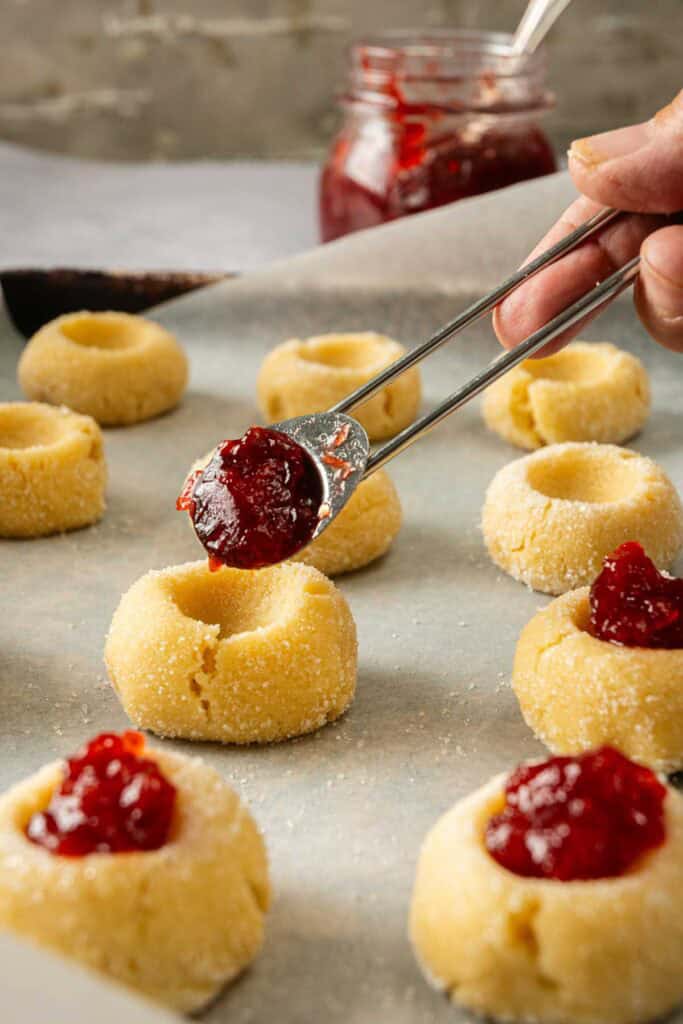
Make the Indentation and Add Jam
Use your thumb or a round spoon to make a small indentation in the center of each cookie. Press down gently but firmly so the indent is deep enough to hold the jam without overflowing.
Spoon about ½ teaspoon of strawberry or apricot jam into each indentation. I like to use a small spoon or even a squeeze bottle for really neat jam placement, but honestly, a regular teaspoon works just fine.
Bake Until Golden
Bake for 12 to 14 minutes, or until the cookies are set and the bottoms are lightly golden. The cookies will still look slightly soft on top when you take them out, but they’ll firm up as they cool. Don’t overbake them or they’ll lose that tender texture.
Cool Completely
Allow the cookies to cool on the baking sheet for about 10 minutes so they can set without breaking apart, then carefully transfer them to a wire rack to cool completely. The jam will be very hot right out of the oven, so let them cool before eating or packaging them up.
Finally, serve and enjoy!
These cookies travel really well as long as you pack them carefully so the jam centers don’t get smudged. I like to arrange them in a single layer in a sturdy portable food container with parchment paper between layers if I’m stacking them.
Keep them in a cool spot since the jam can get a bit sticky in warm temperatures.

Equipment
Ingredients
- 1 cup unsalted butter softened
- ⅔ cup granulated sugar plus 3 tablespoons for rolling the cookies
- 2 large egg yolks at room temperature
- 1 teaspoon pure vanilla extract
- ¼ teaspoon salt
- 2 ⅓ cups all-purpose flour
- ½ cup strawberry or apricot jam

Video
Instructions
- Preheat the oven to 350°F (180°C). Line two large baking sheets with parchment paper or silicone mats and set aside.
- In a large bowl or in the bowl of a stand mixer fitted with the paddle attachment, beat the softened butter and granulated sugar together for 1 to 2 minutes until smooth and well combined. Mix in the egg yolks, vanilla extract, and salt until fully incorporated.1 cup unsalted butter, ⅔ cup granulated sugar, 2 large egg yolks, 1 teaspoon pure vanilla extract, ¼ teaspoon salt
- Gradually mix in the all-purpose flour until the dough comes together. It may look crumbly at first—keep mixing until it forms a smooth dough.2 ⅓ cups all-purpose flour
- Scoop about 1 tablespoon of dough per cookie and roll each portion into a smooth ball. For a touch of sparkle, roll the dough balls in granulated sugar before placing them on the prepared baking sheets.
- Use your thumb or the end of a wooden spoon to make a small indentation in the center of each cookie. Spoon about ½ teaspoon of strawberry or apricot jam into each indentation.½ cup strawberry or apricot jam
- Bake for 12 to 14 minutes, or until the cookies are set and the bottoms are lightly golden.
- Allow the cookies to cool on the baking sheet for about 10 minutes, then carefully transfer them to a wire rack to cool completely.
Notes
Nutrition
SERIOUSLY GOOD
DESSERTS!
Dessert First is a collection of 61 RECIPES to show you that you can make beautiful, impressive desserts right in your own kitchen, no matter your skill level.
Immediate eBook download. No physical book available.
∙ Lemon Pound Cake
∙ Starbucks Cake Pops
∙ Boston Cream Pie
∙ Chocolate Mousse
∙ Matcha Tiramisu
...and much more!
Includes ad-free recipes like:
How to Store Leftovers
These thumbprint cookies stay fresh at room temperature in an airtight container for 3 to 5 days or up to a week in the fridge. I like to layer them between sheets of parchment paper so the fruit jam doesn’t stick to the cookies above.
For longer storage, flash-freeze them in a single layer on a rimmed freezer-safe baking sheet for about an hour first, before transferring them to a freezer container or freezer bag, so the cookies don’t stick together, and the jam stays intact.
They freeze well for up to 2 months. When you’re ready to serve them, just let them thaw at room temperature for about 30 minutes, and they’ll taste like you just baked them.
What to Serve With Thumbprint Cookies
These cookies pair beautifully with hot coffee, tea, or a cold glass of milk, especially during the holidays when you want something sweet but not too heavy. I also love arranging them on a dessert platter alongside sugar cookies, snickerdoodles, or chocolate crinkles for parties, cookie swaps, or afternoon gatherings where guests can try a variety of treats.
More Easy Recipes for You to Try at Home
Check out these other delicious cookie recipes I think you’ll love making.