Marry Me Cookies

The first time I made Marry Me Cookies, I realized they weren’t just another chocolate chip variation. They’re chewy, rich, and sweet with a hint of warmth from cinnamon that makes them cozy. A small step gives them a nutty depth you don’t normally get from a regular cookie recipe, and that’s a reason I keep baking them.

This post contains affiliate links. As an Amazon Affiliate, if you purchase through those links, I earn a commission. Thank you!
These cookies always fit right in, whether it’s for a simple family treat, a gift, a party, or a game day with friends. I also usually make them on a Sunday night for the kids’ lunchboxes, and since they can be made ahead, you can keep them chilled in the fridge or on the counter, and you can freeze a batch, too.
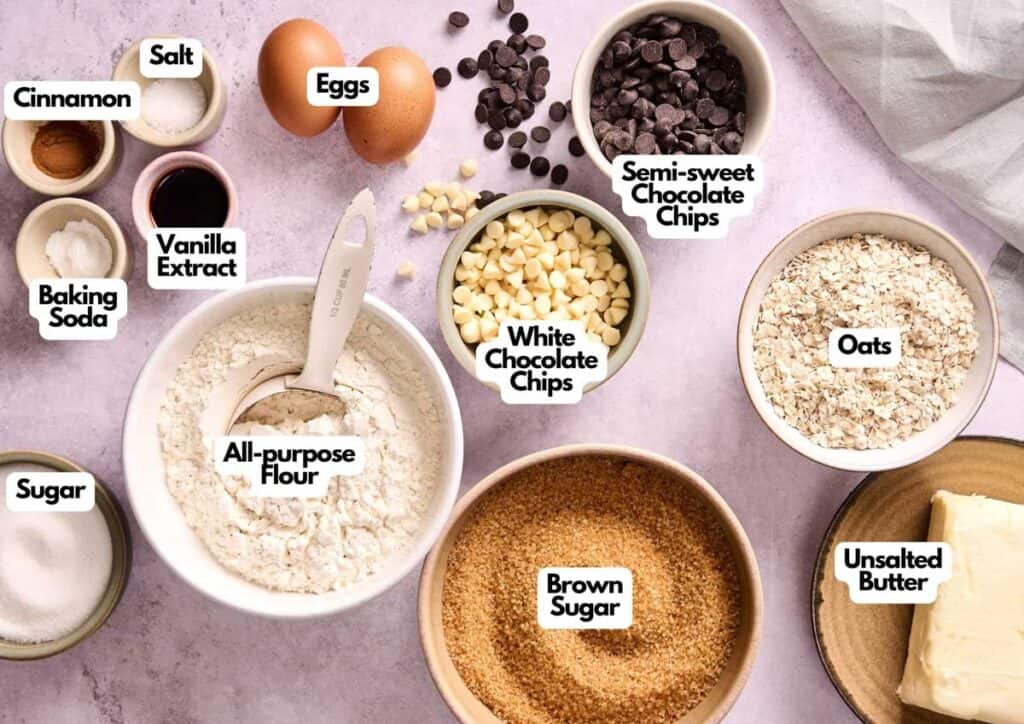
Ingredients You’ll Need
You’ll need all the ingredients shown in the photograph below.
How to Make Marry Me Cookies with Step-By-Step Instructions
Scroll down for the full recipe card containing a full printable recipe and measurements in both US customary and metric units.
If you follow my simple steps, you’ll find that making Marry Me Cookies is worth every minute in the kitchen.
Brown the Butter
Start by melting the butter in a medium saucepan over medium-low heat. A saucepan with a double spout like this one works really well, so you can neatly and easily pour the mixture later.
Keep stirring and scrape the bottom often with a spatula so it doesn’t burn or stick. I use a heat-resistant silicone spatula to make sure nothing gets scorched.
After 6–7 minutes, the butter will foam and then turn deep golden brown with a nutty aroma; that’s when you know it’s ready.
SERIOUSLY GOOD
DESSERTS!
Dessert First is a collection of 61 RECIPES to show you that you can make beautiful, impressive desserts right in your own kitchen, no matter your skill level.
Immediate eBook download. No physical book available.
∙ Lemon Pound Cake
∙ Starbucks Cake Pops
∙ Boston Cream Pie
∙ Chocolate Mousse
∙ Matcha Tiramisu
...and much more!
Includes ad-free recipes like:

Mix in the Sugars
Take the pan off the heat and immediately stir in the brown sugar and granulated sugar into the browned butter until smooth. Adding the sugars right away helps them dissolve evenly while the butter is still hot.
The butter-sugar mixture should look glossy and come together without unmixed pockets; using a hand mixer on medium speed helps greatly with this. I like using this hand mixer because it’s powerful and comes with its own storage case.
Transfer to a bowl and chill in the refrigerator for about 10 minutes so it doesn’t scramble the eggs later. I use a non-slip mixing bowl so it stays in place once I start combining the wet and dry ingredients later.
Prepare the Baking Sheets
Preheat your oven to 325°F (165°C). Line two large baking sheets with parchment paper so the cookies don’t stick, and cleanup is easier.
I usually reach for my nonstick baking sheets for easy cleanup, and these precut parchment paper sheets; they lay flat and save time.
Combine Dry and Wet Ingredients
Once the butter mixture has cooled slightly, whisk in the eggs and vanilla extract until smooth. A balloon whisk makes combining the eggs and vanilla really quick and easy. Then, add the flour, oats, baking soda, salt, and cinnamon.
Gently stir the dry and wet ingredients together manually or on medium-low speed with a mixer until just combined. Don’t overmix; you want the cookies to stay tender, not tough.
Fold in the Chocolate Chips
Use a spatula or a wooden spoon to fold in the white chocolate chips and semisweet chocolate chips. Make sure the chips are spread evenly throughout the cookie dough so every bite has a little of both.
A wooden spoon makes folding super easy and helps scrape down the bowl completely without scratching.
Scoop and Shape the Dough
Scoop the dough with a 2-tablespoon cookie scoop or spoon to form them into medium-size balls. Place them onto the prepared baking sheets, leaving about 2 inches of space between each, so they have room to expand as they bake.
To measure even portions of cookie dough, use a cookie scoop or kitchen scale. I use a cookie scoop to get a consistent size, and if you prefer exact weights, this food scale is reliable and easy to clean.
Gently press down on the tops with the back of a spoon to flatten them slightly. If you don’t, you might end up with cookies that are a little puffier in the center and less uniform in shape. You can also sprinkle a few extra chocolate chips on top if you like.
Bake and Cool the Cookies
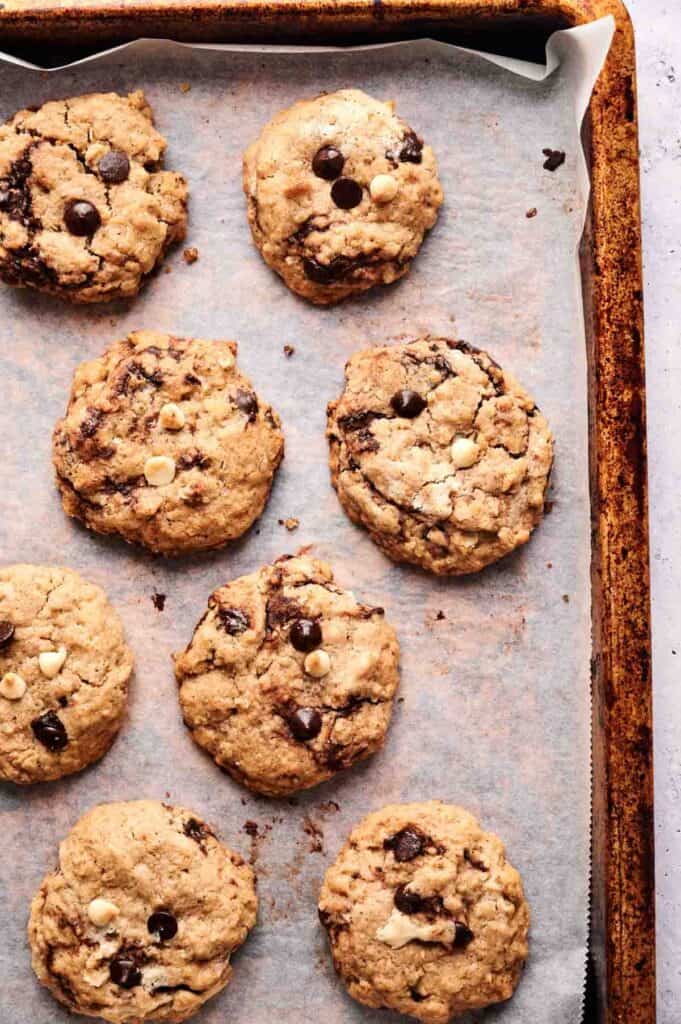
Bake in the preheated oven for 11–13 minutes. The baking time is just enough for the edges to turn golden while the centers still look soft. This is the key to how you lock in its chewy texture, so don’t overbake.
Let the cookies sit on the sheet pans for a few minutes so they can firm up and don’t break apart. Once cooled slightly, transfer them to a cooling rack to cool completely before digging in. This helps them keep their perfect cookie shape.
A nonstick cooling rack like this one gives the cookies plenty of airflow to set up properly without them sticking.
Serve and Enjoy
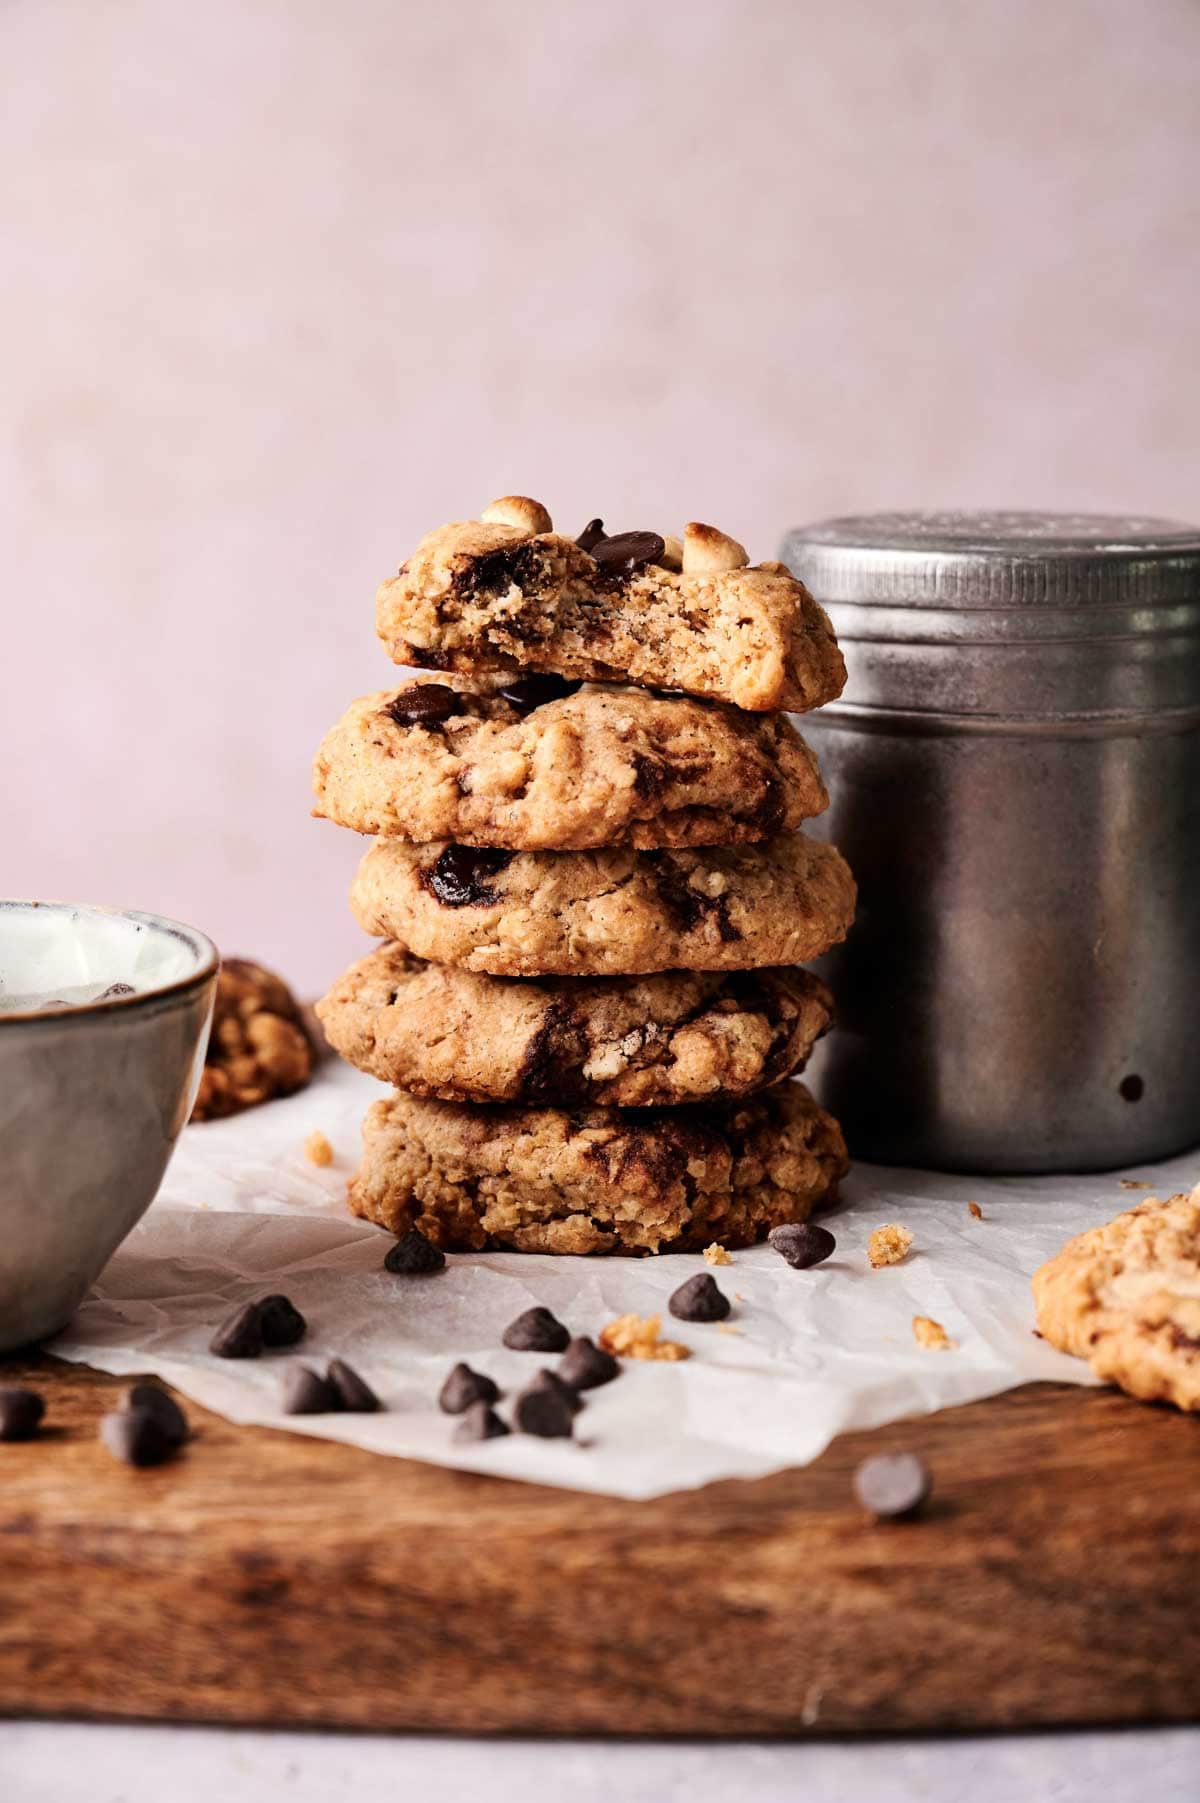
These cookies are best served fresh, though you can also save them for later. Enjoy them on their own, with milk, coffee, or even layered into an ice cream sandwich!
If you’re taking these to a party, potluck, or holiday gathering, use a hard-sided container to protect the cookies and an insulated casserole carrier to keep them cool and safe during transport.
They surely make a wholesome gift as well; I usually pack them in a rigid cookie gift box like this to keep them presentable and more inviting.
Equipment
Ingredients
- 1 cup unsalted butter
- 1¼ cups light brown sugar
- ½ cup granulated sugar
- 2 large eggs at room temperature
- 1 teaspoon pure vanilla extract
- 2 cups all-purpose flour
- 1 cup old-fashioned oats
- ½ teaspoon baking soda
- 1 teaspoon salt
- ¼ teaspoon ground cinnamon
- 1 cup white chocolate chips
- 1 cup semi-sweet chocolate chips
Video
Instructions
- In a medium saucepan over medium-low heat, melt the butter. Stir constantly with a spatula, scraping the bottom to prevent burning. After 6–7 minutes, the butter will foam, then turn a deep golden brown and develop a rich, nutty aroma. Remove from heat.1 cup unsalted butter
- Immediately stir in the brown sugar and granulated sugar until smooth and fully incorporated. Transfer the mixture to a bowl and refrigerate for about 10 minutes to cool slightly.1¼ cups light brown sugar, ½ cup granulated sugar
- Preheat your oven to 325°F (165°C). Line two baking sheets with parchment paper.
- Once the butter mixture has cooled, stir in the eggs and vanilla extract until smooth. Add the flour, oats, baking soda, salt, and cinnamon. Stir until just combined—do not overmix. Fold in both the white and semi-sweet chocolate chips.2 large eggs, 1 teaspoon pure vanilla extract, 2 cups all-purpose flour, 1 cup old-fashioned oats, ½ teaspoon baking soda, 1 teaspoon salt, ¼ teaspoon ground cinnamon, 1 cup white chocolate chips, 1 cup semi-sweet chocolate chips
- Using a 2-tablespoon cookie scoop (or spoon), drop dough balls onto the prepared baking sheets, leaving about 2 inches of space between each. Gently flatten the tops with the back of a spoon.
- Bake for 11–13 minutes, or until the edges are lightly golden but the centers still look soft. Avoid overbaking to keep them chewy.
- Let the cookies cool on the baking sheet for a few minutes before transferring them to a wire rack to cool completely.
Notes
- Brown the butter carefully: Browning the melted butter brings out a nutty depth and gives your cookies an edge over a standard recipe. This is what gives you a nicely browned butter cookie with a light, distinct toffee flavor.
- Don’t skip the chill time: Cool the butter-sugar mixture in the refrigerator before adding eggs. This important chilling step is key to keeping the texture smooth and preventing problems with the batter.
- Add an extra egg yolk if you want: This makes the center richer and softer without changing the overall structure of the cookies.
- Measure the flour correctly: Spoon the flour into your measuring cup and level it off instead of scooping directly, which can add too much flour. A kitchen scale also comes in handy.
- Combine the dry mixture: You can mix the flour, oats, baking soda, salt, and cinnamon in a separate bowl first before adding to the wet ingredients to help spread the leavening agents evenly and avoid unmixed pockets in the batter.
- Scrape the bottom of the bowl: When mixing the wet ingredients with the dry, scrape along the bottom of the bowl to catch any flour or sugar that settles. This prevents unmixed pockets in the batter and keeps the texture consistent.
- Mix up different kinds of chocolate: The recipe uses semisweet and white chips, but you can swap in milk or dark chocolate if that’s more your style.
- Try pecans for variety: Folding chopped pecans into the cookie dough adds crunch and extra flavor alongside the chocolate.
Nutrition
SERIOUSLY GOOD
DESSERTS!
Dessert First is a collection of 61 RECIPES to show you that you can make beautiful, impressive desserts right in your own kitchen, no matter your skill level.
Immediate eBook download. No physical book available.
∙ Lemon Pound Cake
∙ Starbucks Cake Pops
∙ Boston Cream Pie
∙ Chocolate Mousse
∙ Matcha Tiramisu
...and much more!
Includes ad-free recipes like:
Recipe Notes and Expert Tips
I’ve baked these homemade cookies more than a few times, and here are some of the tips that really help you get that bakery-style finish:
- Brown the butter carefully: Browning the melted butter brings out a nutty depth and gives your cookies an edge over a standard recipe. This is what gives you a nicely browned butter cookie with a light, distinct toffee flavor.
- Don’t skip the chill time: Cool the butter-sugar mixture in the refrigerator before adding eggs. This important chilling step is key to keeping the texture smooth and preventing problems with the batter.
- Add an extra egg yolk if you want: This makes the center richer and softer without changing the overall structure of the cookies.
- Measure the flour correctly: Spoon the flour into your measuring cup and level it off instead of scooping directly, which can add too much flour. A kitchen scale also comes in handy.
- Combine the dry mixture: You can mix the flour, oats, baking soda, salt, and cinnamon in a separate bowl first before adding to the wet ingredients to help spread the leavening agents evenly and avoid unmixed pockets in the batter.
- Scrape the bottom of the bowl: When mixing the wet ingredients with the dry, scrape along the bottom of the bowl to catch any flour or sugar that settles. This prevents unmixed pockets in the batter and keeps the texture consistent.
- Mix up different kinds of chocolate: The recipe uses semisweet and white chips, but you can swap in milk or dark chocolate if that’s more your style.
- Try pecans for variety: Folding chopped pecans into the cookie dough adds crunch and extra flavor alongside the chocolate.
How to Store Leftovers
Store your cookies in an airtight container at room temperature for up to 7 days. Make sure they’re fully cooled first to prevent condensation, which creates too much moisture inside, making them soggy.
I like using airtight glass containers to keep the cookies fresh and visible on the counter. If you like them a little firmer, you can keep them in the fridge for up to 2 weeks; just bring them back to room temperature before eating.
These cookies also freeze really well. Just place them in a freezer-safe container and store for up to 3 months. This freezer container is perfect for longer storage without freezer burn.
You can also place them in freezer-proof resealable bags with sheets of wax paper between layers to prevent them from sticking. I’ve had good results using these reusable freezer bags for saving space and avoiding freezer mess.
When you’re ready to enjoy them again, let them thaw on the counter or give them a quick warm-up in the microwave in short bursts for a fresh-baked taste.
More Easy Recipes for You to Try at Home
If you’re craving a seriously delicious cookie like this recipe that doesn’t take much effort or time to make, I’ve got plenty more to keep your cravings satisfied.